Slayer: Difference between revisions
TheDiabeto (talk | contribs) No edit summary |
|||
| (56 intermediate revisions by 5 users not shown) | |||
| Line 1: | Line 1: | ||
[[File:Slayer icon.png|left]] | [[File:Slayer icon.png|left]] | ||
'''Slayer''' is a skill that allows players to kill monsters that may otherwise be untargetable by players. Players must visit Slayer Master, who will assign them a task to kill certain monsters based on the player's Combat level. Slayer experience is awarded each time the player kills an assigned monster, and is equal to the monster's Hitpoints multiplied by its experience bonus. | '''Slayer''' is a skill that allows players to kill monsters that may otherwise be untargetable by players. Players must visit Slayer Master, who will assign them a task to kill certain monsters based on the player's Combat level. Slayer experience is awarded each time the player kills an assigned monster, and is equal to the monster's Hitpoints multiplied by its experience bonus. Additionally there are some bosses that require a certain slayer level to fight. 60 '''Slayer''' is required to fight [[Shenron]], 80 '''Slayer''' for the [[Saga Guardian]], and 90 '''Slayer''' is required to fight [[Necro Mewtwo]], [[Nyraxxus the Devourer]] and enter [[Armies of Anubis]] | ||
< | |||
{|class="wikitable | ==Slayer (levels 1-50) Home Area== | ||
{|class="wikitable" align="right" | |||
! colspan="2" align="center" | <center>'''Home Area'''</center> | |||
|- | |||
| colspan="2" align="center" | [[File:Slayer home map.png|285px]] | |||
|- | |||
! Location | |||
| Home Area | |||
|- | |||
! Inhabitants | |||
| Slayer Monsters | |||
|- | |||
!colspan="2" | <center>Map</center> | |||
|- | |||
|colspan="2" align="center" | [[File:Home area slayer map.png|285px]] | |||
|} | |||
===Area information=== | |||
Welcome to the [[Home Area]], where you start slayer. | |||
You can receive tasks from [[Nezik]]. | |||
===Slayer Tasks=== | |||
{| class="wikitable align-center-1 align-center-2 align-center-3 align-center-4 align-center-5 align-center-6 align-center-7 align-center-8 align-center-9" | |||
|- | |||
! Level | |||
! colspan=2 |Name | |||
! Superior variant | |||
! Experience | |||
! Challenge Exp | |||
! Notable drops | |||
! Location | |||
! Assigned by | |||
|- | |||
|1 | |||
|[[File:MooshroomCow.png|x50px]] | |||
|[[Mooshroom]] | |||
|No | |||
|100 | |||
|40 | |||
|Shroom Gear | |||
|2 | |||
|Nezik | |||
|- | |||
|1 | |||
|[[File:Murloc.png|x50px]] | |||
|[[Murloc]] | |||
|No | |||
|1,750 | |||
|700 | |||
|Amulet of Strength , Magic & Range | |||
|1 | |||
|Nezik | |||
|- | |||
|35 | |||
|[[File:L8tnkzi2.png|52x52px]] | |||
|[[Sagannoth]] | |||
|No | |||
|4,000 | |||
|1,600 | |||
|Herbs and gems | |||
|[[Sagannoth Caves]] | |||
|Nezik | |||
|- | |||
|50 | |||
|[[File:Dharok.png|x50px]] | |||
|[[Barrows Brothers]] | |||
|No | |||
|5,600 | |||
|2,240 | |||
|Enchanted key & Barrows Gear | |||
|3 | |||
|Nezik & Glimgast | |||
|- | |||
|50 | |||
|[[File:Solrot_Melee.png|x50px]] | |||
|[[Solrot the Sinful]] | |||
|No | |||
|5,750 | |||
|2,300 | |||
|Ensouled Lanterns | |||
|3 | |||
|Nezik & Glimgast | |||
|- | |||
|55 | |||
|[[File:Prince_Prime.png|51x51px]] | |||
|[[Prince Prime]] | |||
|No | |||
|8,750 | |||
|3,500 | |||
|Shaman gear, Dragon axe | |||
|[[Sagannoth Caves]] | |||
|Nezik | |||
|- | |||
|55 | |||
|[[File:Royal_Rex_NPC.png|50x50px]] | |||
|[[Royal Rex]] | |||
|No | |||
|8,750 | |||
|3,500 | |||
|Brute gear, Dragon axe | |||
|[[Sagannoth Caves]] | |||
|Nezik | |||
|- | |||
|55 | |||
|[[File:King_Supreme_NPC.png|50x50px]] | |||
|[[King Supreme]] | |||
|No | |||
|8,750 | |||
|3,500 | |||
|Huntsman gear, Dragon axe | |||
|[[Sagannoth Caves]] | |||
|Nezik | |||
|} | |||
==Slayer (levels 1-75) Forbidden Forest== | |||
{|class="wikitable" align="right" | |||
! colspan="2" align="center" | <center>'''Forbidden Forest'''</center> | ! colspan="2" align="center" | <center>'''Forbidden Forest'''</center> | ||
|- | |- | ||
| Line 19: | Line 134: | ||
|colspan="2" align="center" | [[File:Forbidden Forest.png|285px]] | |colspan="2" align="center" | [[File:Forbidden Forest.png|285px]] | ||
|} | |} | ||
===Area information=== | ===Area information=== | ||
Welcome to the Forbidden Forest, the first slayer dungeon. | Welcome to the [[Forbidden Forest]], the first slayer dungeon. | ||
Majority of the tasks you get from [[Nezik]] will bring you into the Forest. | Majority of the tasks you get from [[Nezik]] will bring you into the Forest. | ||
| Line 29: | Line 141: | ||
To access the Forbidden Forest head to the red portal (slayer portal). <br>[[File:Slayer Portal.png | 200px]]</br> | To access the Forbidden Forest head to the red portal (slayer portal). <br>[[File:Slayer Portal.png | 200px]]</br> | ||
You can either enter the forbidden forest and walk/run to your task or right click the portal to quick-travel for X-amount of GP. | |||
==Slayer | ===Slayer Tasks=== | ||
{| class="wikitable align-center-1 align-center-2 align-center-4 align-center-6 align-center-7" | {| class="wikitable align-center-1 align-center-2 align-center-3 align-center-4 align-center-5 align-center-6 align-center-7 align-center-8 align-center-9" | ||
|- | |- | ||
! Level | ! Level | ||
| Line 45: | Line 158: | ||
|[[File:Mooncalf NPC.png|x50px]] | |[[File:Mooncalf NPC.png|x50px]] | ||
|[[Mooncalf]] | |[[Mooncalf]] | ||
| | |1,100 | ||
| | |440 | ||
|Herbs, gems and essence | |Herbs, gems and essence | ||
|2 | |2 | ||
| Line 54: | Line 167: | ||
|[[File:Grindylow NPC.png|x50px]] | |[[File:Grindylow NPC.png|x50px]] | ||
|[[Grindylow]] | |[[Grindylow]] | ||
| | |1,350 | ||
| | |540 | ||
|Herbs and gems | |Herbs and gems | ||
|8 | |8 | ||
| Line 63: | Line 176: | ||
|[[File:Erumpent NPC.png|x50px]] | |[[File:Erumpent NPC.png|x50px]] | ||
|[[Erumpent]] | |[[Erumpent]] | ||
| | |1.850 | ||
| | |740 | ||
|Herbs | |Herbs and ore | ||
|4 | |4 | ||
|Nezik | |Nezik | ||
| Line 72: | Line 185: | ||
|[[File:Demiguise NPC.png|x50px]] | |[[File:Demiguise NPC.png|x50px]] | ||
|[[Demiguise]] | |[[Demiguise]] | ||
| | |2,250 | ||
| | |900 | ||
|Herbs and gems | |Herbs and gems | ||
|3 | |3 | ||
|Nezik | |Nezik | ||
|- | |- | ||
| Line 90: | Line 194: | ||
|[[File:Thestral NPC.png|x50px]] | |[[File:Thestral NPC.png|x50px]] | ||
|[[Thestral]] | |[[Thestral]] | ||
| | |3,950 | ||
| | |1,580 | ||
|Herbs and gems | |Herbs and gems | ||
|1 | |1 | ||
| Line 99: | Line 203: | ||
|[[File:Mandrake NPC.png|x50px]] | |[[File:Mandrake NPC.png|x50px]] | ||
|[[Mandrake]] | |[[Mandrake]] | ||
| | |3,800 | ||
| | |1,520 | ||
|Herbs and | |Herbs and secondaries | ||
|9 | |9 | ||
|Nezik | |Nezik | ||
| Line 108: | Line 212: | ||
|[[File:Dire Hound NPC.png|x50px]] | |[[File:Dire Hound NPC.png|x50px]] | ||
|[[Dire hound]] | |[[Dire hound]] | ||
| | |3,950 | ||
| | |1,580 | ||
|Herbs, gems, dragon boots and dragon gloves | |Herbs, gems, dragon boots and dragon gloves | ||
|11 | |11 | ||
| Line 117: | Line 221: | ||
|[[File:Quintaped NPC.png|x50px]] | |[[File:Quintaped NPC.png|x50px]] | ||
|[[Quintaped]] | |[[Quintaped]] | ||
| | |4,500 | ||
| | |1,800 | ||
|Herbs and secondaries | |Herbs and secondaries | ||
|5 | |5 | ||
| Line 126: | Line 230: | ||
|[[File:Graphorn NPC.png|x50px]] | |[[File:Graphorn NPC.png|x50px]] | ||
|[[Graphorn]] | |[[Graphorn]] | ||
| | |5,250 | ||
| | |2,100 | ||
|Potions, food, gems, dragon boots and dragon gloves | |Potions, food, gems, dragon boots and dragon gloves | ||
|10 | |10 | ||
| Line 135: | Line 239: | ||
|[[File:Manticore NPC.png|x50px]] | |[[File:Manticore NPC.png|x50px]] | ||
|[[Manticore]] | |[[Manticore]] | ||
| | |5,500 | ||
| | |2,200 | ||
|Potions, food, gems, secondaries and dragon defender | |Potions, food, gems, secondaries and dragon defender | ||
|7 | |7 | ||
| Line 144: | Line 248: | ||
|[[File:Dementor NPC.png|x50px]] | |[[File:Dementor NPC.png|x50px]] | ||
|[[Dementor]] | |[[Dementor]] | ||
| | |5,750 | ||
| | |2,300 | ||
|Crystal key and bones | |Crystal key and bones | ||
|6 | |6 | ||
| Line 153: | Line 257: | ||
|[[File:Fluffy.png|x50px]] | |[[File:Fluffy.png|x50px]] | ||
|[[Fluffy]] | |[[Fluffy]] | ||
| | |8,500 | ||
| | |3,400 | ||
|Astral crystal, Verdant crystal, Intrepid Crystal, Smouldering stone and scruffy | |Astral crystal, Verdant crystal, Intrepid Crystal, Smouldering stone and scruffy | ||
|6 Fluffy entance | |6 Fluffy entance | ||
|Glimgast | |||
|} | |||
==Slayer (levels 50-85) Dinodragon Domain== | |||
{|class="wikitable" align="right" | |||
! colspan="2" align="center" | <center>'''Dinodragon Domain'''</center> | |||
|- | |||
| colspan="2" align="center" | [[File:Dinomap infobox.png|285px]] | |||
|- | |||
! Location | |||
| Dinodragon Domain | |||
|- | |||
! Inhabitants | |||
| Slayer Monsters | |||
|- | |||
!colspan="2" | <center>Map</center> | |||
|- | |||
|colspan="2" align="center" | [[File:Dragon domain Map.png|285px]] | |||
|} | |||
===Area information=== | |||
Welcome to the [[Dinodragon Domain]], the second slayer dungeon. | |||
You can receive tasks from both [[Glimgast]] & [[Nezik]]. | |||
===How to get there=== | |||
To access the Dinodragon Domain head to the red portal (slayer portal). <br>[[File:Slayer Portal.png | 200px]]</br> | |||
You can either enter the Dinodragon Domain and walk/run to your task, with the right agility level you can use the wall shortcuts or right click the portal to quick-travel for X-amount of GP. | |||
===Slayer Tasks=== | |||
{| class="wikitable align-center-1 align-center-2 align-center-3 align-center-4 align-center-5 align-center-6 align-center-7 align-center-8 align-center-9" | |||
|- | |||
! Level | |||
! colspan=2 |Name | |||
! Superior variant | |||
! Experience | |||
! Challenge Exp | |||
! Notable drops | |||
! Location | |||
! Assigned by | |||
|- | |||
|50 | |||
|[[File:Green Dinodragon.png|x50px]] | |||
|[[Green Dinodragon]] | |||
|No | |||
|5,300 | |||
|2,120 | |||
|Dragonballs | |||
|1 | |||
|Nezik | |Nezik | ||
|- | |||
|65 | |||
|[[File:Blue Dinodragon.png|x50px]] | |||
|[[Blue Dinodragon]] | |||
|No | |||
|5,900 | |||
|2,360 | |||
|Dragonballs | |||
|10 | |||
|Nezik | |||
|- | |||
|75 | |||
|[[File:Red Dinodragon.png|x50px]] | |||
|[[Red Dinodragon]] | |||
|No | |||
|8,250 | |||
|3,300 | |||
|Dragonballs | |||
|7 | |||
|Nezik & Glimgast | |||
|- | |||
|80 | |||
|[[File:Purpledinodrag.png|x50px]] | |||
|[[Purple Dinodragon]] | |||
|No | |||
|12,500 | |||
|5,000 | |||
|Dragonballs | |||
|3 | |||
|Glimgast | |||
|- | |||
|90 | |||
|[[File:Blackdinodrag.png|x50px]] | |||
|[[Black Dinodragon]] | |||
|No | |||
|15,000 | |||
|6,000 | |||
|Dragonballs , [[Black dino leather]] | |||
|3 | |||
|Glimgast | |||
|} | |} | ||
{|class="wikitable | |||
==Slayer (levels 75-99) Kanto Caverns== | |||
{|class="wikitable" align="right" | |||
! colspan="2" align="center" | <center>'''Kanto Caverns'''</center> | ! colspan="2" align="center" | <center>'''Kanto Caverns'''</center> | ||
|- | |- | ||
| Line 176: | Line 377: | ||
|colspan="2" align="center" | [[File:Kanto Caverns Map.png|285px]] | |colspan="2" align="center" | [[File:Kanto Caverns Map.png|285px]] | ||
|} | |} | ||
===Area information=== | ===Area information=== | ||
Welcome to the Kanto Caverns, the | Welcome to the [[Kanto Caverns]], the third slayer dungeon. | ||
Majority of the tasks you get from [[Glimgast]] will bring you into the Caverns. | Majority of the tasks you get from [[Glimgast]] will bring you into the Caverns. | ||
| Line 186: | Line 384: | ||
To access the Kanto Caverns head to the red portal (slayer portal). <br>[[File:Slayer Portal.png | 200px]]</br> | To access the Kanto Caverns head to the red portal (slayer portal). <br>[[File:Slayer Portal.png | 200px]]</br> | ||
You can either enter the Kantgo Caverns and walk/run to your task, with the right agility level you can use the wall shortcuts or right click the portal to quick-travel for X-amount of GP. | |||
==Slayer | ===Slayer Tasks=== | ||
{| class="wikitable align-center-1 align-center-2 align-center-4 align-center-6 align-center-7" | {| class="wikitable align-center-1 align-center-2 align-center-3 align-center-4 align-center-5 align-center-6 align-center-7 align-center-8 align-center-9" | ||
|- | |- | ||
! Level | ! Level | ||
! colspan=2 |Name | ! colspan=2 |Name | ||
! | !Superior variant | ||
! Experience | ! Experience | ||
! Challenge Exp | ! Challenge Exp | ||
| Line 199: | Line 397: | ||
!Location | !Location | ||
!Assigned by | !Assigned by | ||
|- | |||
|75 | |||
|[[File:Necro Koffing.png|x50px]] | |||
|[[Necro Koffing]] | |||
|Yes | |||
|8,000 | |||
|3,200 | |||
|Fury, Mystic left and right half | |||
|1 | |||
|Glimgast | |||
|- | |- | ||
|75 | |75 | ||
| Line 204: | Line 412: | ||
|[[Necro Raichu]] | |[[Necro Raichu]] | ||
|Yes | |Yes | ||
| | |8,000 | ||
| | |3,200 | ||
|Cosmic boots, Mystic left and right half | |Cosmic boots, Mystic left and right half | ||
|2 | |2 | ||
|Glimgast | |Glimgast | ||
|- | |- | ||
| Line 226: | Line 422: | ||
|[[Necro Onix]] | |[[Necro Onix]] | ||
|Yes | |Yes | ||
| | |10,000 | ||
| | |4,000 | ||
|Onix whip,Dragon pikckaxe, | |Onix whip,Dragon pikckaxe, | ||
Mystic left and right half | Mystic left and right half | ||
|3 | |3 | ||
|Glimgast | |Glimgast | ||
|- | |- | ||
| Line 250: | Line 433: | ||
|[[Necro Alakazam]] | |[[Necro Alakazam]] | ||
|Yes | |Yes | ||
| | |15,000 | ||
| | |6,000 | ||
|Necronomicon, Mystic ticket, | |Necronomicon, Mystic ticket, | ||
Mystic left and right half | Mystic left and right half | ||
| Line 259: | Line 441: | ||
|- | |- | ||
|90 | |90 | ||
|[[File:Necro | |[[File:Necro Charizard.png|x50px]] | ||
|[[Necro | |[[Necro Charizard]] | ||
|Yes | |Yes | ||
|Necro | |15,000 | ||
| | |6,000 | ||
| | |Mystic ticket, Mystic left and right half | ||
| | Dragon boots | ||
|5 | |||
|Glimgast | |||
| | |- | ||
|95 | |||
|[[File:Necro Dragonite.png|x50px]] | |||
|[[Necro Dragonite]] | |||
|Yes | |||
|20,000 | |||
|8,000 | |||
|Dragonite skull, Ranger boots, | |||
Mystic ticket, Mystic left and right half, | |||
|6 | |||
|Glimgast | |Glimgast | ||
|- | |- | ||
| Line 275: | Line 466: | ||
|[[Necro Machamp]] | |[[Necro Machamp]] | ||
|Yes | |Yes | ||
| | |19,000 | ||
| | |7,600 | ||
|Champion belt, Mystic ticket, | |Champion belt, Mystic ticket, | ||
Mystic left and right half, Dragon boots | Mystic left and right half, Dragon boots | ||
|7 | |7 | ||
|Glimgast | |||
|} | |||
==Slayer (levels 90-99) Ancient Atoll== | |||
{|class="wikitable" align="right" | |||
! colspan="2" align="center" | <center>'''Ancient Atoll'''</center> | |||
|- | |||
| colspan="2" align="center" | [[File:Ancient Atoll overlook.png|285x285px]] | |||
|- | |||
! Location | |||
| Ancient Atoll | |||
|- | |||
! Inhabitants | |||
| Elemental Golems | |||
|- | |||
!colspan="2" | <center>Map</center> | |||
|- | |||
|colspan="2" align="center" | [[File:Ancient Atoll Map.png|285px]] | |||
|} | |||
===Area information=== | |||
Welcome to the [[Ancient Atoll]], the fourth slayer dungeon. | |||
Majority of the tasks you get from [[Glimgast]] will bring you to Ancient Atoll. | |||
===How to get there=== | |||
To access the Ancient Atoll head to the red portal (slayer portal). <br>[[File:Slayer Portal.png | 200px]]</br> | |||
You can either enter the Ancient Atoll and walk/run to your task, tele there with the ::sg command or right click the portal to quick-travel for X-amount of GP. | |||
===Slayer Tasks=== | |||
{| class="wikitable align-center-1 align-center-2 align-center-3 align-center-4 align-center-5 align-center-6 align-center-7 align-center-8 align-center-9" | |||
|- | |||
! Level | |||
! colspan=2 |Name | |||
! Superior variant | |||
! Experience | |||
! Challenge Exp | |||
! Notable drops | |||
! Location | |||
! Assigned by | |||
|- | |||
|90 | |||
|[[File:ArcaneGolem.png|x50px]] | |||
|[[Arcane Golem]] | |||
|Yes | |||
|5,250 | |||
|2,100 | |||
|Dust, Totemic shard | |||
|Ancient Atoll | |||
|Glimgast | |||
|- | |||
|90 | |||
|[[File:FireGolem.png|x50px]] | |||
|[[Fire Golem]] | |||
|Yes | |||
|5,250 | |||
|2,100 | |||
|Dust, Totemic shard | |||
|Ancient Atoll | |||
|Glimgast | |||
|- | |||
|90 | |||
|[[File:IceGolem.png|x50px]] | |||
|[[Ice Golem]] | |||
|Yes | |||
|5,250 | |||
|2,100 | |||
|Dust, Totemic shard | |||
|Ancient Atoll | |||
|Glimgast | |||
|- | |||
|90 | |||
|[[File:ShadowGolem.png|x50px]] | |||
|[[Shadow Golem]] | |||
|Yes | |||
|5,250 | |||
|2,100 | |||
|Dust, Totemic shard | |||
|Ancient Atoll | |||
|Glimgast | |Glimgast | ||
|- | |- | ||
| | |90 | ||
|[[File: | |[[File:StoneGolem.png|x50px]] | ||
|[[ | |[[Stone Golem]] | ||
|Yes | |Yes | ||
| | |5,250 | ||
| | |2,100 | ||
|Dust, Totemic shard | |||
| | |Ancient Atoll | ||
| | |||
|Glimgast | |Glimgast | ||
|} | |||
==Slayer (level 99) Bosses== | |||
===Area information=== | |||
[[Lazarus]] will provide you with boss tasks, and take you all over RuneSaga. | |||
===Slayer Tasks=== | |||
{| class="wikitable align-center-1 align-center-2 align-center-3 align-center-4 align-center-5 align-center-6 align-center-7 align-center-8 align-center-9" | |||
|- | |||
! Level | |||
! colspan=2 |Name | |||
! Superior variant | |||
! Experience | |||
! Challenge Exp | |||
! Notable drops | |||
! Location | |||
! Assigned by | |||
|- | |||
|99 | |||
|[[File:Necro_Mewtwo.png|frameless|60x60px]] | |||
|[[Necro Mewtwo]] | |||
|No | |||
|31,250 | |||
|12,500 | |||
|Psychic set, Soulless sapphire | |||
|Kanto Caverns | |||
|Lazarus | |||
|- | |||
|99 | |||
|[[File:Gyarados.png|60x60px]] | |||
|[[Gyarados]] | |||
|No | |||
|21,250 | |||
|8,500 | |||
|Serpent hide, Serpent strike | |||
|South east of Home | |||
|Lazarus | |||
|- | |||
|99 | |||
|[[File:Nyraxxus_the_Devourer2.png|frameless|90x90px]] | |||
|[[Nyraxxus the Devourer]] | |||
|No | |||
|31,250 | |||
|12,500 | |||
|Demonhunter set, Ragefire ruby | |||
|Cave of Nyraxxus | |||
|Lazarus | |||
|- | |||
|99 | |||
|[[File:Thalos.png|frameless|60x60px]] | |||
|[[Thalos, Sentinel of Seasons]] | |||
|No | |||
|43,750 | |||
|17,500 | |||
|Sylvan set, Everbane emerald | |||
|Far south east of home | |||
|Lazarus | |||
|- | |||
|99 | |||
|[[File:Trials1.png|60x60px]] | |||
|[[Temple of Trials|Temple of Trials Completion]] | |||
|No | |||
|35,000 | |||
|14,000 | |||
|Elric's set, Ilion's set, Stygian's set | |||
|Invention building | |||
|Lazarus | |||
|- | |||
|99 | |||
|[[File:Bowser Jr.png|60x60px]] | |||
|[[Bowser Jr.]] | |||
|No | |||
|43,750 | |||
|17,500 | |||
|King's claws, Scarhide leather | |||
|By gamble stairs | |||
|Lazarus | |||
|- | |||
|99 | |||
|[[File:Capone.png|frameless|60x60px]] | |||
|[[Robo Capone]] | |||
|No | |||
|21,250 | |||
|8,500 | |||
|Chaos engine | |||
|Zones 5 | |||
|Lazarus | |||
|- | |||
|99 | |||
|[[File:Double_stitch.png|frameless|60x60px]] | |||
|[[Double Stitch]] | |||
|No | |||
|21,250 | |||
|8,500 | |||
|Gloves of Vigilance, Darksight sceptre | |||
|East of Home | |||
|Lazarus | |||
|- | |||
|99 | |||
|[[File:Molten_Jad_Pet.png|frameless|31x31px]] | |||
|[[Molten Jad]] | |||
|No | |||
|87,500 | |||
|35,000 | |||
|Molten tokkul | |||
|Fight Caves | |||
|Lazarus | |||
|- | |||
|99 | |||
|[[File:Atomic_Jad.png|frameless|31x31px]] | |||
|[[Atomic Jad]] | |||
|No | |||
|87,500 | |||
|35,000 | |||
|Atomic tokkul | |||
|Fight Caves | |||
|Lazarus | |||
|- | |||
|99 | |||
|[[File:Cold_Fusion_Jad.png|frameless|31x31px]] | |||
|[[Cold Fusion Jad]] | |||
|No | |||
|87,500 | |||
|35,000 | |||
|Cold fusion tokkul | |||
|Fight Caves | |||
|Lazarus | |||
|} | |} | ||
==Slayer shop== | ==Slayer shop== | ||
{| class="wikitable align-center-1" | |||
! Item | |||
{| class="wikitable align-center- | |||
! | |||
! Name | ! Name | ||
!Points | !Slayer Points | ||
|- | |- | ||
|[[File:Slayer helmet melee.png|center]] | |[[File:Slayer helmet melee.png|center]] | ||
|Slayer helmet (melee) | |[[Slayer helmet (melee)]] | ||
|500 | |500 | ||
|- | |- | ||
|[[File:Slayer helmet magic.png|center]] | |[[File:Slayer helmet magic.png|center]] | ||
|Slayer helmet (magic) | |[[Slayer helmet (magic)]] | ||
|500 | |500 | ||
|- | |- | ||
|[[File:Slayer helmet range.png|center]] | |[[File:Slayer helmet range.png|center]] | ||
|Slayer | |[[Slayer helmet (ranged)]] | ||
|500 | |500 | ||
|- | |- | ||
|[[File:Slayer ring.png|center]] | |[[File:Slayer ring.png|center]] | ||
|Slayer ring | |[[Slayer ring]] | ||
|425 | |425 | ||
|- | |- | ||
|[[File:20% Magic dmg boost.png|center]] | |[[File:20% Magic dmg boost.png|center]] | ||
|20% | |[[20% Dmg Boost Card (Magic)]] | ||
| | |25 | ||
|- | |- | ||
|[[File:20% Range dmg boost card.png|center]] | |[[File:20% Range dmg boost card.png|center]] | ||
|20% Damage Boost Card ( | |[[20% Damage Boost Card (Range)]] | ||
| | |25 | ||
|- | |- | ||
|[[File:5% Luck Boost Card.png|center]] | |[[File:5% Luck Boost Card.png|center]] | ||
|5% Luck Boost Card | |[[5% Luck Boost Card]] | ||
| | |35 | ||
|- | |- | ||
|[[File:20% Dmg Boost Card (Melee).png|center]] | |[[File:20% Dmg Boost Card (Melee).png|center]] | ||
|20% | |[[20% Dmg Boost Card (Melee)]] | ||
| | |25 | ||
|- | |- | ||
|[[File:5% Crit Boost Card.png|center]] | |[[File:5% Crit Boost Card.png|center]] | ||
|5% Crit Boost Card | |[[5% Crit Boost Card]] | ||
| | |35 | ||
|- | |- | ||
|[[File:Ring of wealth.png|center]] | |[[File:Ring of wealth.png|center]] | ||
|Ring of wealth | |[[Ring of wealth]] | ||
|500 | |500 | ||
|- | |- | ||
|[[File:Ring of wealth scroll.png|center]] | |[[File:Ring of wealth scroll.png|center]] | ||
|Ring of wealth scroll | |[[Ring of wealth scroll]] | ||
|750 | |750 | ||
|- | |- | ||
|[[File:Arcane prayer scroll.png|center]] | |[[File:Arcane prayer scroll.png|center]] | ||
|Arcane prayer scroll | |[[Arcane prayer scroll]] | ||
| | |1,500 | ||
|- | |- | ||
|[[File:Dexterous prayer scroll.png|center]] | |[[File:Dexterous prayer scroll.png|center]] | ||
|Dexterous prayer scroll | |[[Dexterous prayer scroll]] | ||
| | |1,500 | ||
|- | |- | ||
|[[File:Ring of retrieval unlimited.png|center]] | |[[File:Ring of retrieval unlimited.png|center]] | ||
|Ring of retrieval (unlimited) | |[[Ring of retrieval (unlimited)]] | ||
| | |1,250 | ||
|- | |- | ||
|[[File:Lucky Chest.png|center]] | |[[File:Lucky Chest.png|center]] | ||
|Lucky | |[[Lucky Chest]] | ||
|500 | |500 | ||
|- | |- | ||
|[[File:Dwarven rock cake.png|center]] | |[[File:Dwarven rock cake.png|center]] | ||
|Dwarven rock cake | |[[Dwarven rock cake]] | ||
|120 | |120 | ||
|- | |- | ||
|[[File:Bonecrusher.png|center]] | |[[File:Bonecrusher.png|center]] | ||
|Bonecrusher | |[[Bonecrusher]] | ||
|600 | |600 | ||
|- | |- | ||
|[[File:Fortune Token.png|center]] | |[[File:Fortune Token.png|center]] | ||
|Fortune Token | |[[Fortune Token]] | ||
|100 | |100 | ||
|- | |- | ||
|[[File:Fighter torso.png|center]] | |[[File:Fighter torso.png|center]] | ||
|Fighter torso | |[[Fighter torso]] | ||
|400 | |400 | ||
|- | |- | ||
|[[File:Gilded urn.png|center]] | |[[File:Gilded urn.png|center]] | ||
|Gilded urn | |[[Gilded urn]] | ||
|350 | |350 | ||
|- | |||
|[[File:Eye of Anubis 1.png|center]] | |||
|[[Eye of Anubis]] | |||
|5 | |||
|- | |||
|[[File:Shiny charm.png|center]] | |||
|[[Shiny charm]] | |||
|2,000 | |||
|- | |||
|[[File:Warp scroll.png]] | |||
|[[Warp scroll]] | |||
|2,500 | |||
|} | |} | ||
==Strategy== | ==Strategy== | ||
The fastest way to gain points is | The fastest way to gain points is resetting tasks at [[Nezik]] until you get 30~ kill tasks. And always skip [[Dementor|dementors]]. | ||
Latest revision as of 20:43, 4 November 2024

Slayer is a skill that allows players to kill monsters that may otherwise be untargetable by players. Players must visit Slayer Master, who will assign them a task to kill certain monsters based on the player's Combat level. Slayer experience is awarded each time the player kills an assigned monster, and is equal to the monster's Hitpoints multiplied by its experience bonus. Additionally there are some bosses that require a certain slayer level to fight. 60 Slayer is required to fight Shenron, 80 Slayer for the Saga Guardian, and 90 Slayer is required to fight Necro Mewtwo, Nyraxxus the Devourer and enter Armies of Anubis
Slayer (levels 1-50) Home Area

| |
| Location | Home Area |
| Inhabitants | Slayer Monsters |

| |
Area information
Welcome to the Home Area, where you start slayer. You can receive tasks from Nezik.
Slayer Tasks
| Level | Name | Superior variant | Experience | Challenge Exp | Notable drops | Location | Assigned by | |
|---|---|---|---|---|---|---|---|---|
| 1 | 
|
Mooshroom | No | 100 | 40 | Shroom Gear | 2 | Nezik |
| 1 | Murloc | No | 1,750 | 700 | Amulet of Strength , Magic & Range | 1 | Nezik | |
| 35 | 
|
Sagannoth | No | 4,000 | 1,600 | Herbs and gems | Sagannoth Caves | Nezik |
| 50 | Barrows Brothers | No | 5,600 | 2,240 | Enchanted key & Barrows Gear | 3 | Nezik & Glimgast | |
| 50 | Solrot the Sinful | No | 5,750 | 2,300 | Ensouled Lanterns | 3 | Nezik & Glimgast | |
| 55 | 
|
Prince Prime | No | 8,750 | 3,500 | Shaman gear, Dragon axe | Sagannoth Caves | Nezik |
| 55 | Royal Rex | No | 8,750 | 3,500 | Brute gear, Dragon axe | Sagannoth Caves | Nezik | |
| 55 | King Supreme | No | 8,750 | 3,500 | Huntsman gear, Dragon axe | Sagannoth Caves | Nezik | |
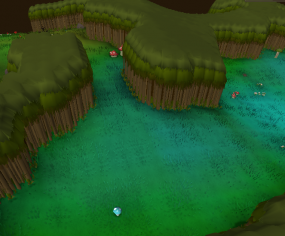
Slayer (levels 1-75) Forbidden Forest
| |
| Location | Forbidden Forest |
| Inhabitants | Slayer Monsters |
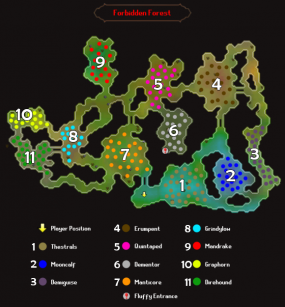
| |
Area information
Welcome to the Forbidden Forest, the first slayer dungeon. Majority of the tasks you get from Nezik will bring you into the Forest.
How to get there
To access the Forbidden Forest head to the red portal (slayer portal). 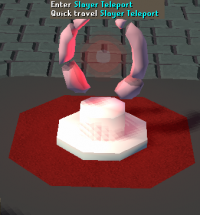
You can either enter the forbidden forest and walk/run to your task or right click the portal to quick-travel for X-amount of GP.
Slayer Tasks
| Level | Name | Experience | Challenge Exp | Notable drops | Location | Assigned by | |
|---|---|---|---|---|---|---|---|
| 15 | Mooncalf | 1,100 | 440 | Herbs, gems and essence | 2 | Nezik | |
| 20 | 
|
Grindylow | 1,350 | 540 | Herbs and gems | 8 | Nezik |
| 25 | 
|
Erumpent | 1.850 | 740 | Herbs and ore | 4 | Nezik |
| 30 | 
|
Demiguise | 2,250 | 900 | Herbs and gems | 3 | Nezik |
| 50 | 
|
Thestral | 3,950 | 1,580 | Herbs and gems | 1 | Nezik |
| 50 | 
|
Mandrake | 3,800 | 1,520 | Herbs and secondaries | 9 | Nezik |
| 50 | 
|
Dire hound | 3,950 | 1,580 | Herbs, gems, dragon boots and dragon gloves | 11 | Nezik |
| 60 | 
|
Quintaped | 4,500 | 1,800 | Herbs and secondaries | 5 | Nezik |
| 65 | 
|
Graphorn | 5,250 | 2,100 | Potions, food, gems, dragon boots and dragon gloves | 10 | Nezik |
| 70 | 
|
Manticore | 5,500 | 2,200 | Potions, food, gems, secondaries and dragon defender | 7 | Nezik |
| 75 | 
|
Dementor | 5,750 | 2,300 | Crystal key and bones | 6 | Nezik |
| 75 | 
|
Fluffy | 8,500 | 3,400 | Astral crystal, Verdant crystal, Intrepid Crystal, Smouldering stone and scruffy | 6 Fluffy entance | Glimgast |
Slayer (levels 50-85) Dinodragon Domain
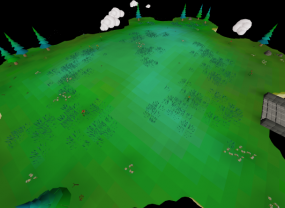
| |
| Location | Dinodragon Domain |
| Inhabitants | Slayer Monsters |
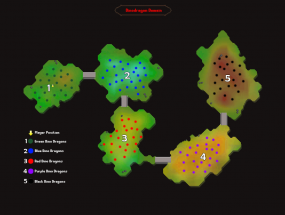
| |
Area information
Welcome to the Dinodragon Domain, the second slayer dungeon. You can receive tasks from both Glimgast & Nezik.
How to get there
To access the Dinodragon Domain head to the red portal (slayer portal). 
You can either enter the Dinodragon Domain and walk/run to your task, with the right agility level you can use the wall shortcuts or right click the portal to quick-travel for X-amount of GP.
Slayer Tasks
| Level | Name | Superior variant | Experience | Challenge Exp | Notable drops | Location | Assigned by | |
|---|---|---|---|---|---|---|---|---|
| 50 | Green Dinodragon | No | 5,300 | 2,120 | Dragonballs | 1 | Nezik | |
| 65 | Blue Dinodragon | No | 5,900 | 2,360 | Dragonballs | 10 | Nezik | |
| 75 | Red Dinodragon | No | 8,250 | 3,300 | Dragonballs | 7 | Nezik & Glimgast | |
| 80 | Purple Dinodragon | No | 12,500 | 5,000 | Dragonballs | 3 | Glimgast | |
| 90 | 
|
Black Dinodragon | No | 15,000 | 6,000 | Dragonballs , Black dino leather | 3 | Glimgast |
Slayer (levels 75-99) Kanto Caverns
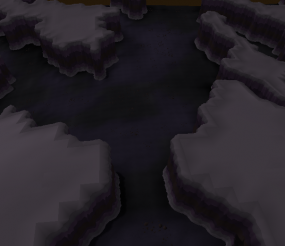
| |
| Location | Kanto Caverns |
| Inhabitants | Slayer Monsters |
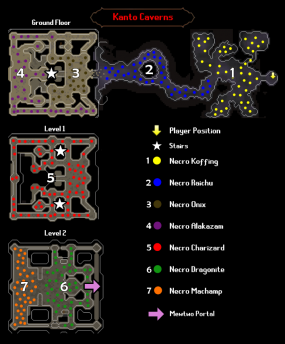
| |
Area information
Welcome to the Kanto Caverns, the third slayer dungeon. Majority of the tasks you get from Glimgast will bring you into the Caverns.
How to get there
To access the Kanto Caverns head to the red portal (slayer portal). 
You can either enter the Kantgo Caverns and walk/run to your task, with the right agility level you can use the wall shortcuts or right click the portal to quick-travel for X-amount of GP.
Slayer Tasks
| Level | Name | Superior variant | Experience | Challenge Exp | Notable drops | Location | Assigned by | |
|---|---|---|---|---|---|---|---|---|
| 75 | 
|
Necro Koffing | Yes | 8,000 | 3,200 | Fury, Mystic left and right half | 1 | Glimgast |
| 75 | 
|
Necro Raichu | Yes | 8,000 | 3,200 | Cosmic boots, Mystic left and right half | 2 | Glimgast |
| 80 | Necro Onix | Yes | 10,000 | 4,000 | Onix whip,Dragon pikckaxe,
Mystic left and right half |
3 | Glimgast | |
| 90 | 
|
Necro Alakazam | Yes | 15,000 | 6,000 | Necronomicon, Mystic ticket,
Mystic left and right half |
4 | Glimgast |
| 90 | 
|
Necro Charizard | Yes | 15,000 | 6,000 | Mystic ticket, Mystic left and right half
Dragon boots |
5 | Glimgast |
| 95 | Necro Dragonite | Yes | 20,000 | 8,000 | Dragonite skull, Ranger boots,
Mystic ticket, Mystic left and right half, |
6 | Glimgast | |
| 95 | 
|
Necro Machamp | Yes | 19,000 | 7,600 | Champion belt, Mystic ticket,
Mystic left and right half, Dragon boots |
7 | Glimgast |
Slayer (levels 90-99) Ancient Atoll
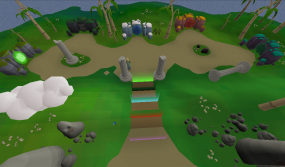
| |
| Location | Ancient Atoll |
| Inhabitants | Elemental Golems |
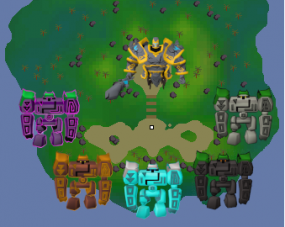
| |
Area information
Welcome to the Ancient Atoll, the fourth slayer dungeon. Majority of the tasks you get from Glimgast will bring you to Ancient Atoll.
How to get there
To access the Ancient Atoll head to the red portal (slayer portal). 
You can either enter the Ancient Atoll and walk/run to your task, tele there with the ::sg command or right click the portal to quick-travel for X-amount of GP.
Slayer Tasks
| Level | Name | Superior variant | Experience | Challenge Exp | Notable drops | Location | Assigned by | |
|---|---|---|---|---|---|---|---|---|
| 90 | 
|
Arcane Golem | Yes | 5,250 | 2,100 | Dust, Totemic shard | Ancient Atoll | Glimgast |
| 90 | 
|
Fire Golem | Yes | 5,250 | 2,100 | Dust, Totemic shard | Ancient Atoll | Glimgast |
| 90 | 
|
Ice Golem | Yes | 5,250 | 2,100 | Dust, Totemic shard | Ancient Atoll | Glimgast |
| 90 | 
|
Shadow Golem | Yes | 5,250 | 2,100 | Dust, Totemic shard | Ancient Atoll | Glimgast |
| 90 | 
|
Stone Golem | Yes | 5,250 | 2,100 | Dust, Totemic shard | Ancient Atoll | Glimgast |
Slayer (level 99) Bosses
Area information
Lazarus will provide you with boss tasks, and take you all over RuneSaga.
Slayer Tasks
| Level | Name | Superior variant | Experience | Challenge Exp | Notable drops | Location | Assigned by | |
|---|---|---|---|---|---|---|---|---|
| 99 | Necro Mewtwo | No | 31,250 | 12,500 | Psychic set, Soulless sapphire | Kanto Caverns | Lazarus | |
| 99 | Gyarados | No | 21,250 | 8,500 | Serpent hide, Serpent strike | South east of Home | Lazarus | |
| 99 | 
|
Nyraxxus the Devourer | No | 31,250 | 12,500 | Demonhunter set, Ragefire ruby | Cave of Nyraxxus | Lazarus |
| 99 | Thalos, Sentinel of Seasons | No | 43,750 | 17,500 | Sylvan set, Everbane emerald | Far south east of home | Lazarus | |
| 99 | 
|
Temple of Trials Completion | No | 35,000 | 14,000 | Elric's set, Ilion's set, Stygian's set | Invention building | Lazarus |
| 99 | 
|
Bowser Jr. | No | 43,750 | 17,500 | King's claws, Scarhide leather | By gamble stairs | Lazarus |
| 99 | Robo Capone | No | 21,250 | 8,500 | Chaos engine | Zones 5 | Lazarus | |
| 99 | Double Stitch | No | 21,250 | 8,500 | Gloves of Vigilance, Darksight sceptre | East of Home | Lazarus | |
| 99 | Molten Jad | No | 87,500 | 35,000 | Molten tokkul | Fight Caves | Lazarus | |
| 99 | Atomic Jad | No | 87,500 | 35,000 | Atomic tokkul | Fight Caves | Lazarus | |
| 99 | Cold Fusion Jad | No | 87,500 | 35,000 | Cold fusion tokkul | Fight Caves | Lazarus | |
Slayer shop
| Item | Name | Slayer Points |
|---|---|---|
| Slayer helmet (melee) | 500 | |
| Slayer helmet (magic) | 500 | |
| Slayer helmet (ranged) | 500 | |
| Slayer ring | 425 | |
| 20% Dmg Boost Card (Magic) | 25 | |
| 20% Damage Boost Card (Range) | 25 | |
| 5% Luck Boost Card | 35 | |
| 20% Dmg Boost Card (Melee) | 25 | |
| 5% Crit Boost Card | 35 | |
| Ring of wealth | 500 | |
| Ring of wealth scroll | 750 | |
| Arcane prayer scroll | 1,500 | |
| Dexterous prayer scroll | 1,500 | |
| Ring of retrieval (unlimited) | 1,250 | |
| Lucky Chest | 500 | |
| Dwarven rock cake | 120 | |
| Bonecrusher | 600 | |
| Fortune Token | 100 | |
| Fighter torso | 400 | |
| Gilded urn | 350 | |
| Eye of Anubis | 5 | |
| Shiny charm | 2,000 | |
| Warp scroll | 2,500 |
Strategy
The fastest way to gain points is resetting tasks at Nezik until you get 30~ kill tasks. And always skip dementors.


