Starter Guide
Welcome to Runesaga and its official Starter guide.
The Starter guide is intended to help new players begin their journey with ease. This guide covers a wide range of topics including; Skills, money making, and some early-game content in Runesaga.
Logging in
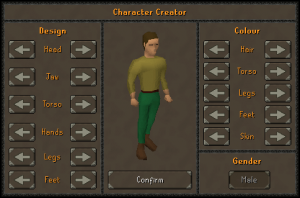
Upon login you will be faced with an interface to choose your characters appearance.
Your appearance can be changed later in game by the make-over mage if you wish to do so.
Once you have finished your characters appearance you can click confirm to lock it in.
Choosing your mode
Runesaga has a selection of games modes from from normal to challenge mode ironman.
Upon choosing your desired mode you cannot swap from normal mode to challenge mode so make sure to choose wisely, although ironmen can convert to normal mode but cannot convert back to ironman.
Normal mode:
Normal mode and normal ironman mode includes 250x experience rate for combat and 50x experience rate for skilling.
This is the fastest experience mode on Runesaga however you miss out on the 5% Crit and 5% Luck chance.
Challenge mode:
Challenge mode and challenge ironman mode includes 30x experience rate for combat, 20x experience rate for skilling with an additional +5% Crit Chance and +5% Luck chance.
Limiting yourself to lower experience rates greatly benefits you with a reward of Crit and Luck chance for your extra efforts.
After deciding which route you would like to take press confirm and your character will begin to walk towards the Runesaga Guide.

Runesaga Guide
The Runesaga Guide will be your first interaction with an NPC in the game he will give you tasks to complete numbered 1-20. There is a full guide on the task list 1-20 here Runesaga Guide Tasks completing all these tasks you will receive 10 Scholar's bags these bags will reward you a full set of scholars armour. Which includes Scholar's halo, -top, -legs, -shield, -boots, -gloves, -staff, -bow, -sword and -amulet.

Commands for new players
::Locus will give you a Elite recruit chest containing a variety of items to help you on your journey.

This crate consists of the following:
Ring of retrieval that has 2000 charges *this is not the Ring of retrieval (unlimited)* ![]()
Elite pet box - which contains a pet from the Pet crate table giving you one of the 25 pets available. ![]()
Damage boost cards for range magic and melee ![]()
![]()
![]()
5% and 8% Luck and Crit cards ![]()
![]()
![]()
![]()
5m coins ![]()
100 Sharks ![]()
50 Behemoth bones ![]() using these on the altar will give you a high enough prayer level to fight World bosses and Voteboss from the start. which is explained in the next section of this guide.
using these on the altar will give you a high enough prayer level to fight World bosses and Voteboss from the start. which is explained in the next section of this guide.
::vote will take you to a voting page which once voted you can use ;;Claimvotes in game you will receive 5% damage boost and 5% experience boost these boosts will last 12 hours until you can vote again you will also receive a Vote ticket ![]() and a Fortune token
and a Fortune token ![]() you will also be able to loot the Voteboss chest 2x upon its death at ::Voteboss or::vb. Voteboss will spawn every 25 votes and 50 votes. Vote tickets are also tradable and can be sold in the early game to get some early gold.
you will also be able to loot the Voteboss chest 2x upon its death at ::Voteboss or::vb. Voteboss will spawn every 25 votes and 50 votes. Vote tickets are also tradable and can be sold in the early game to get some early gold.
World bosses and Vote bosses
World bosses and Vote bosses are a good way to get some early game rewards from the drops and the stackable currency that can be spent at Mr. Mordaut shop and Vote Knight shop with World boss tokens ![]() and Vote tickets
and Vote tickets ![]()
;;Worldboss and ;;Voteboss are the commands to teleport to these bosses there is also ;;Shenron but this requires 60 slayer. more info on Shenron here.
Vote tickets are a good way to get some of your early QOL upgrades such as Ring of wealth, Ring of retrieval (unlimited), Bonecrusher, Gilded urn. Although all of these are obtainable from the slayer shop it is a good idea to split slayer points and vote tickets at the start of your journey to obtain these 4 items as soon as you can.
AFK skilling zone
Runesaga offers a very nice AFK Zone (::afk) where players can train there skills whilst not being active this method is not the fastest by all means but it requires no input and can be left overnight to gain that bit of extra experience that you would not have seen otherwise. The AFK zone also gives you 1 x AFK token per action which can be traded in at Bubbles (AFK Rewards) for lamps and other rewards, the lamps give 20k exp in challenger mode and 50k in normal mode. This method offers around 3k AFK tokens per hour giving you around 60k exp in challenger mode and 150k exp in normal mode.

Portals at home
There is 4 main portal at home which direct you to several locations
Prayer Teleport

Inside this portal there are Temple Guardians and Bone Lords which you can kill for bones to train prayer for early levels this is a good method they also have a chance to drop noted bones. There is also a Dark altar inside of this portal which you can use the bones you get from the Temple Guardians and Bone Lords on for extra prayer experience. Using ranged or magic in here you can use the altar to safe spot the NPCs in here.
Skilling Teleport

Inside this portal there is the ability to train most non combat stats.
There is various shops around the skilling zone which sells tools and supplies.
Master Smelter - sells pickaxes, ores and a hammer.
Master Forester - sells axes, tinderbox and a knife.
Master Fisher - sells fishing tools and baits.
Master Crafter - sells chisel, needle, thread, amulet moulds and uncut gems.
Skills that cannot be trained in here include Herblore, Thieving, Invention and Slayer.
Slayer Teleport

In this teleporter there is 3 different areas which include Forbidden Forest, Dinodragon Domain and Kanto Caverns.
- Forbidden Forest has early game slayer monsters to slay which drop a lot of herblore and food supplies.
- Dinodragon Domain is the home to Green, Blue, Red, Purple and Black Dinodragons which notably drop Dragonballs #1-7 which can be used to place at ::shenron once all 7 balls have been placed it will spawn Shenron for all players to attack and receive loot from.
- Kanto Cavern is the home to Necro Slayer and all monsters in this area are Pokémon they are very good for slayer and also very good for drops.
Zones Teleport

In this teleporter there is 5 different zones which are for Invention, each zone area requires kill count to reach the boss but once the kill count is achieved you will no longer be required to get it again after reaching the boss you will have unlimited access to the boss. Zones is the recommended route to take throughout Runesaga due to the armour progression in this area which is needed for most of the end game gears and content.
Wildshroom Woods : Home to Megamush - 7 waves of mushrooms.
Mashup Mayhem : Home to Ewok Commander - 4 waves of Ewoks (each holding different weapons such as twin katanas, bō, twin sais and nunchaku representing the four ninja turtles!)
Ghost Grid : Home to Pac-Man - 6 waves of Ghosts.
Unknown Underworld : Home to Ancient Mew - 8 waves of unowns (which spell out DISCOVER)
Clockwork Coliseum : Home to Robo Capone - 6 waves of metal bots.
Trading Post
The Trading Post is where players can buy and sell items for Coins or Platinum tokens.
You can list items similar to the grand exchange but cannot put offers in for items as of yet.
Items on the trading post will remain there until either bought or removed and will not appear in the trade post if the seller is offline.
It is located west of the fountain at home.

Early game money making
There is a few ways to make money in the early game you can see the methods here at Early game money making.
Early game gear progression
In all of these methods it is recommended to still follow the Runesaga guides tasks as this will also give you Scholars armour, weapons, amulet which are an upgrade to the starter gear.
Mooshrooms > Barrows > Zones. This method can get you on the path towards good end game gear with skipping out Sagannoth kings.
Mooshrooms > Barrows > Sagannoth kings > Zones. The Sagannoth gear can be a good way to get ahead in the earlier tiers of zones having better damage per second against Megamush and Ewok.
For non irons you could buy one of the 3 Sagannoth sets which is estimated around tier 1.5 Solrot and each of these sets costs around about 250m that can be a very good early game method for most players without trade restrictions. if you take this method having that extra bit of damage will make Barrows/Solrot/Zones much easier to start with.
Early game gear progression areas
Barrows is located east of home inside of the crypt.
inside of barrows there are 7 brothers to fight Ahrim the Blighted, Dharok the Wretched, Guthan the Infested, Karil the Tainted, Torag the Corrupted, Verac the Defiled and Solrot the Sinful.

Sagannoth Caves are located east of home.
Inside the Sagannoth Cave there is 3 Boss Sagannoths Royal Rex, Prince Prime and King Supreme requiring 15 kill count on the Sagannoths for a 20 minute instance for each of the bosses.

Tzhaar Entrance is located east of home the south side to Barrows and Sagannoth kings.
In this area you will have access to 4 different capes each of the capes will require the same combat style to fight inside of the cave so for example the Atomic cape will require you to do the full fight cave 63 waves using only ranged the only exception to this is the standard fire cape.
Fire cape: This cape is a tri-brid cape it works for all 3 combat styles.
Atomic cape: Ranged fire cape.
Cold fusion cape: Magic fire cape.
Molten cape: Melee fire cape.

Crit and Luck chance explained
How Crit and Luck chance works.
You start off with 0% Crit and 0% luck unless you have chosen the Challenge mode option which you will then start with 5% in each of the criteria.
Crit chance: a percentage chance to double your damage for the next hit when critically hitting your enemy the hit splat will appear gold ![]() you can double you maximum hit with this there is plenty of ways to increase your Crit chance with items such as the Ring of wealth, Ring of wealth (i), Ring of precision, Max cape, Completionist cape, 5% Crit Boost Card, 8% Crit Boost Card and rings from the events
you can double you maximum hit with this there is plenty of ways to increase your Crit chance with items such as the Ring of wealth, Ring of wealth (i), Ring of precision, Max cape, Completionist cape, 5% Crit Boost Card, 8% Crit Boost Card and rings from the events
Luck chance: a percentage chance to roll a second drop on the drop table of the NPC you are killing (this does not mean your item will be doubled) there is plenty of ways to increase your Luck chance with items such as Ring of wealth, Ring of wealth (i), Ring of greed, Max cape, Completionist cape, 5% Luck Boost Card, 8% Luck Boost Card and rings from events.